

Table of Contents
- Why Standardizing Bathroom Components Prevents Leaks in Student Housing
- Common Plumbing Failure Points in High-Traffic Student Bathrooms
- Step 1: Audit Your Current Plumbing Fixtures and Identify Inconsistencies
- Step 2: Select OEM-Grade Components for Durability and Consistency
- Step 3: Establish a Standardization Procurement Checklist
- Plumbing Maintenance Best Practices for Property Managers
- Preventing Water Damage in Student Housing Through Design and Installation
- Reducing Maintenance Callbacks in Student Apartments with Standardized Components
- Frequently Asked Questions
Last Updated: September 20, 2026
Why Standardizing Bathroom Components Prevents Leaks in Student Housing
Leaks in student housing bathrooms are expensive, causing wall damage, mold, and unit closures, problems that standardize bathroom components student housing can prevent. Most facilities treat each leak as a separate crisis instead of preventing them systematically.
Standardizing bathroom components across student housing units prevents leaks by eliminating inconsistency. When every unit uses the same fixtures, supply lines, and drainage systems, your maintenance team can spot problems early, order parts faster, and install replacements correctly every time.
Ready Bathroom Solutions helps facilities standardize bathroom components student housing through pre-kitted maintenance sets. Instead of hunting for parts across multiple suppliers, your team gets everything they need in one box.
Common Plumbing Failure Points in High-Traffic Student Bathrooms
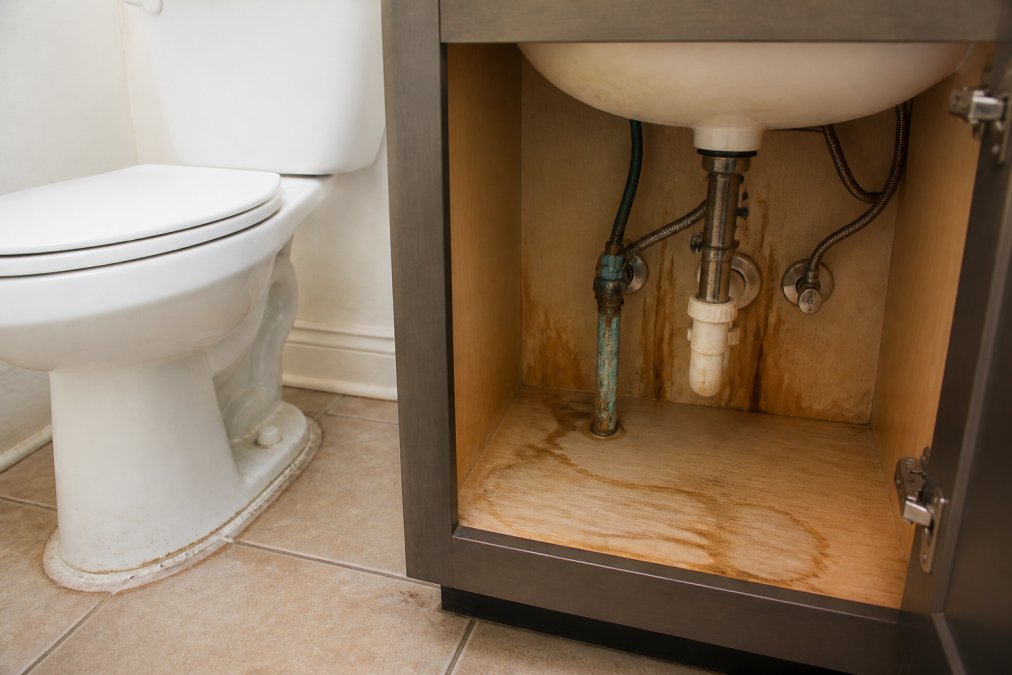
Student housing bathrooms fail faster than standard apartments due to heavy use (10-20 occupants per unit per year), inexperienced residents, and deferred maintenance.
Flush Valves and Fill Valves
Flush valve failures account for most toilet leaks in high-traffic bathrooms. Students use toilets roughly 8-12 times daily per occupant, 80-120 flushes per unit per day.
Fill valves wear out faster in student housing: 2-3 years versus 5-7 years in residential settings. Failed fill valves run constantly, often unreported by residents, causing silent water damage and spiked bills.
Flush valves fail similarly, with worn flappers allowing water seepage, mold growth, and cross-contamination.
The fix is simple: replace both valves with OEM-grade components rated for commercial use. These handle higher cycle counts. They last longer. They cost more upfront but save money in callbacks and emergency repairs.
Supply Lines and Wax Rings
Supply lines are the most common leak source in student housing. Braided stainless steel lines last 5-10 years; rubber lines fail in 2-3 years under constant use and pressure fluctuations.
Pressure spikes occur when residents yank shutoff valves instead of opening them slowly. These surges stress supply lines, causing micro-tears and water seepage into walls behind toilets and vanities.
Wax rings fail when reused after toilet removal. Compression causes seal loss, allowing sewer gas escape and water leaks around the base.
The solution: standardize on rigid supply lines or reinforced braided lines rated for high-pressure environments. Replace wax rings every time a toilet is removed.
Drainage Systems and Waterproofing Failures
Drainage problems stem from poor waterproofing: shower pans without proper slope, failing caulk, and water-absorbing grout.
Step 1: Audit Your Current Plumbing Fixtures and Identify Inconsistencies
Start with a complete inventory: visit every unit and document fixture type, brand, and age.
Create a spreadsheet with these columns:
| Building | Unit | Toilet Brand | Fill Valve Type | Supply Line | Wax Ring | Shower Valve | Drain Size |
|---|---|---|---|---|---|---|---|
| A | 101 | Kohler | Fluidmaster | Braided | Standard | Moen | 2" |
| A | 102 | Toto | Fluidmaster | Rubber | Standard | Delta | 2" |
| A | 103 | Kohler | Korky | Braided | Standard | Moen | 2" |
Step 2: Select OEM-Grade Components for Durability and Consistency
OEM-grade (original equipment manufacturer) parts meet commercial durability standards and last longer than budget alternatives.
Step 3: Establish a Standardization Procurement Checklist
Create a checklist that your maintenance team uses for every repair. This ensures consistency.
Bathroom Fixture Standardization Checklist:
- Toilet: Kohler model 3977 (or approved equivalent)
- Fill valve: Fluidmaster 400H (commercial-grade)
- Flush valve: Korky 528 or equivalent
- Supply lines: Braided stainless steel, 3/8" compression
- Wax ring: Premium rubber, 4" standard
- Shutoff valve: 1/4-turn ball valve, 1/2"
- Shower valve: Moen 1255 or Delta equivalent
- Caulk: Silicone-based, mold-resistant
- Grout: Epoxy-based for moisture resistance
- Pressure control valve: Installed on main line (verify setting 50-60 psi)
Plumbing Maintenance Best Practices for Property Managers
Standardized components require proper maintenance. Reactive maintenance costs 3-5 times more than preventative maintenance.

Preventative Maintenance Schedules
Set a maintenance schedule and stick to it.
Quarterly tasks:
- Inspect all caulk and grout in bathrooms
- Test fill and flush valves for proper operation
- Check supply lines for moisture or corrosion
- Verify shutoff valves open and close smoothly
Semi-annual tasks:
- Replace caulk that's cracked or failing
- Inspect wax rings by removing toilet (if replacement needed)
- Test water pressure at multiple points (target 50-60 psi)
- Inspect drainage for slow drains or blockages
Annual tasks:
Pressure Control Valve - WATTS →
- Replace fill valves in all units (proactive replacement)
- Inspect and reseal grout in shower areas
- Pressure-test supply lines for micro-leaks
- Document all maintenance in a database
Maintenance schedules prevent emergencies, catch problems early, and keep units in service longer.
Leak Detection and Sensor-Based Alerts
Smart building technology now makes leak detection automatic. Water sensors placed strategically alert you to problems before visible damage occurs.
Preventing Water Damage in Student Housing Through Design and Installation
Water damage results from poor design and installation; fixing both prevents most leaks.
Waterproofing Strategies and Material Selection
Waterproofing must begin during construction or renovation.
Shower pan waterproofing:
- Slope the pan 1/4 inch per foot toward the drain
- Use membrane waterproofing under tile
- Seal all grout with epoxy-based sealant
- Install a secondary drain if the primary fails
Wall protection:
- Use cement board or waterproof drywall in bathrooms
- Install laminated wall panels in high-splash areas (around tubs and showers)
- Seal all penetrations where pipes pass through walls
- Install a vapor barrier behind tile
Material selection for durability:
- Choose porcelain tile over ceramic (more durable, less porous)
- Use epoxy grout instead of standard grout (resists moisture and mold)
- Select commercial-grade caulk rated for wet environments
- Install pressure control valves to reduce stress on supply lines
These materials cost more upfront but last 2-3 times longer, saving money over a 10-year lifecycle.
Installation Training for Maintenance Staff
Standardized components fail when installed incorrectly. Your team needs hands-on training.
Cover these topics in training:
Proper installation technique:
- How to remove old fixtures without damaging walls
- Correct torque specifications for bolts and connections
- How to seat wax rings without compression
- Proper caulking application and cleanup
Pressure and flow:
- How to set pressure control valves
- How to identify high-pressure problems
- How to test shutoff valve operation
Inspection and troubleshooting:
- How to spot early signs of valve failure
- How to identify supply line stress
- How to test for leaks before reassembling
Reducing Maintenance Callbacks in Student Apartments with Standardized Components
Callbacks are expensive and signal system failures.
Why Callbacks Happen and How Standardization Fixes Them
Callbacks result from wrong parts, poor installation, or incomplete repairs. Standardization eliminates all three by ensuring consistent, correct installation.
Lifecycle Cost Analysis: Retrofitting vs. New Construction
The decision to retrofit or replace affects your timeline and budget. Both approaches work. The choice depends on your facility's age and condition.
Retrofitting existing bathrooms:
- Cost: $800-1,500 per unit
- Timeline: 2-4 hours per unit
- Disruption: Minimal (one bathroom at a time)
- Best for: Facilities with 5-15 years of life remaining
- Advantage: Spread costs over time as units turn
New construction or major renovation:
- Cost: $3,000-5,000 per unit (full bathroom)
- Timeline: Full renovation takes weeks per unit
- Disruption: Significant (units offline during work)
- Best for: Facilities nearing end of life or requiring major structural work
- Advantage: Install everything to current code and standards
Frequently Asked Questions
What are the most common causes of bathroom leaks in student housing?
The most frequent leak sources are worn flush valves and fill valves, deteriorated supply lines, and failed wax rings under toilets. In high-traffic student housing, fixtures experience accelerated wear from heavy use and often improper maintenance. Inconsistent plumbing components across units mean maintenance teams must carry multiple repair kits, increasing response time. Standardizing to durable OEM-grade components reduces these failure points significantly.
How does standardizing bathroom components reduce maintenance callbacks?
When all units use identical plumbing fixtures, maintenance staff work faster because they know exactly which parts fit every unit. They stock one repair kit instead of five. Installation becomes consistent, reducing improper connections that cause repeat leaks. Pre-kitted solutions like those from Ready Bathroom Solutions eliminate store runs and ensure OEM-grade quality on every repair, helping to reduce callback rates by ensuring the first fix holds.
Should we retrofit existing student housing units or wait for new construction?
Retrofit decisions depend on lifecycle cost analysis. If units are 5+ years old with recurring leak complaints, retrofitting high-failure components (flush valves, supply lines, wax rings) pays back quickly through reduced callbacks and faster unit turns. New construction benefits from standardization from day one, but retrofitting the worst-performing fixtures in existing units often delivers faster ROI than waiting for complete renovations.
What should we include in a standardization procurement checklist?
Your checklist should specify fixture brands, pipe sizes, valve types, waterproofing materials, and sensor-based alert systems. Document the exact model numbers for toilets, sinks, supply lines, and drainage components used across your portfolio. Include installation requirements and maintenance intervals. Pre-kitted solutions from suppliers like Ready Bathroom Solutions simplify this by bundling all necessary OEM-grade parts, reducing procurement complexity and ensuring consistency across all units.