

Table of Contents
- Gather the Right Tools and Parts Before You Start
- Bathroom Sink Repair: Shut Off Water and Access the Valve
- Faucet Cartridge Replacement: Remove the Old Cartridge
- Clean the Valve Body and Install the New Cartridge
- Reassemble the Faucet and Test for Leaks
- Troubleshooting Stuck Valves and Commercial vs. Residential Differences
- Reducing Maintenance Labor Costs with Standardized Kits
- Conclusion
- Frequently Asked Questions
Last Updated: September 30, 2026
Gather the Right Tools and Parts Before You Start
- Adjustable wrench and a spanner wrench
- Flat-head and Phillips screwdriver
- Hex key set (for handle set screws)
- Replacement cartridge or faucet stem
- O-rings, gaskets, and plumber's grease
- Teflon tape and pipe dope
- Towels and a small bucket
Starting without the replacement part turns a 30-minute fix into a two-trip job. A pre-kitted repair set puts every part in one box.
Bathroom Sink Repair: Shut Off Water and Access the Valve
Bathroom sink repair always starts the same way: cut the water. Close the shut-off valve under the sink, or turn off the main water shut-off if the local valve is stuck or missing. Then open the faucet to drain pressure from the line.
Faucet Cartridge Replacement: Remove the Old Cartridge
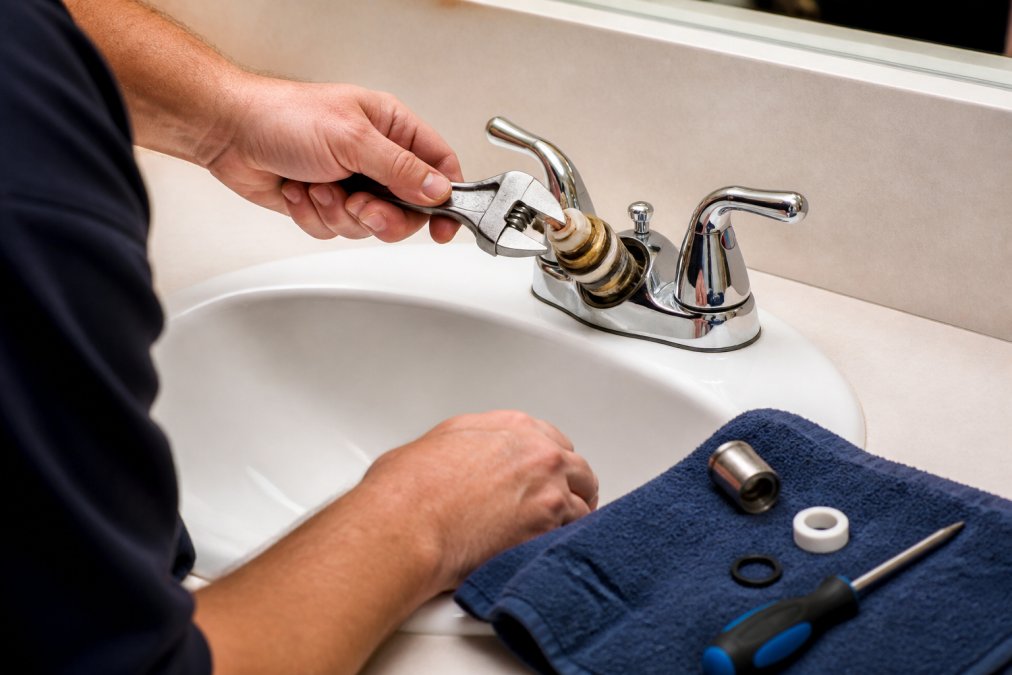
Inspect the old part as it comes out. A worn O-ring or a torn gasket tells you exactly what failed.
Clean the Valve Body and Install the New Cartridge
Before the new cartridge goes in, clean the valve housing. Mineral buildup and grit cause new parts to fail early, so wipe the inside and check for corrosion.
Then install the new cartridge:
- Coat the new O-rings and gaskets with plumbing grease.
- Slide the cartridge into the valve body, aligned with the locating tabs.
- Reinstall the retaining nut or clip and tighten it snug.
- Reconnect the water supply lines with fresh Teflon tape on the threads.
Reassemble the Faucet and Test for Leaks
Reassemble in reverse order: trim plate, escutcheon, then handle. Tighten the set screw so the handle moves smoothly without wobble.
- The spout (cartridge seal)
- The base of the faucet (O-ring and gasket)
- The supply lines (thread connections)
Troubleshooting Stuck Valves and Commercial vs. Residential Differences
Most guides assume the cartridge slides out on the first pull. In student housing, high-turnover units cycle faucets frequently, and hard water can leave calcium and magnesium deposits that cement the cartridge into the valve body, turning a routine repair into a longer job.
Why commercial and residential valves are not the same job
Residential faucets typically use a single-handle cartridge or two-handle compression stem in a brass or plastic valve body, held by a retaining nut or U-clip.
- Pressure-balancing or thermostatic mixing valves. These use a piston or wax element to hold outlet temperature within a narrow band as supply pressure fluctuates. You cannot swap one for a standard cartridge; the mixing mechanism is the valve.
- Ceramic-disc cartridges. Common in commercial lines, these resist mineral buildup better than rubber-seated residential cartridges but crack if forced.
- Heavier retaining hardware. Commercial valves often use a threaded bonnet or locking collar instead of a simple clip, and some require a spanner wrench sized to the bonnet nut rather than an adjustable wrench.
- Larger inlet ports and flow restrictors. Commercial fixtures are frequently built to a specific flow rate, and the restrictor is part of the valve, not the aerator.
Freeing a seized cartridge without cracking the valve body
Work through these steps in order. Stop as soon as the cartridge moves.
- Shut off and drain. Confirm both supply stops are closed and open the faucet to relieve pressure, a pressurized line will spray the moment the seal breaks.
- Remove the retaining hardware completely. A partially backed-out clip will bind the cartridge and make it feel seized when it is not.
- Apply penetrating oil at the cartridge-to-body seam. Give it 10 to 15 minutes and reapply once. Do not use heat, a torch will scorch a chrome-finished valve body and can damage internal seals.
- Use a cartridge puller. These inexpensive tools thread onto the cartridge stem and pull it straight out. Pliers and channel locks grip off-axis and can contribute to snapped cartridges and cracked bodies.
- Rock, do not lever. Without a puller, rotate the stem a few degrees side to side to break the mineral bond, then pull straight out. Never pry against the valve body or finished wall.
- Escalate to descaling. A 50/50 white vinegar and water soak applied with a rag around the seam for 20 to 30 minutes dissolves light calcium deposits. Rinse thoroughly before installing the new cartridge.
- Know when to stop. If the stem has snapped flush with the body, or the body is cracked, the repair is now a valve replacement, a wall-access job, not a cartridge job.
After the repair: closing up the wall
If you cut an access panel to reach the valve, do not leave it open. Student housing units are inspected, and an open wall is both a code and a liability issue.
Faucet Repair Part - DELTA FAUCET CO →
- Drywall access: Cut a clean rectangular opening, fit a spring-loaded or hinged access door sized to the opening, and secure it with the manufacturer's clips. Access doors are sold in standard sizes and are the fastest compliant close-out.
- Tile: Match the tile and grout color as closely as possible. Keep a small stock of the unit's original tile on hand, chasing a match after the fact is far more expensive than storing a few square feet.
- Fiberglass tub surrounds: Use a fiberglass repair kit rated for wet environments. Patch from the back where possible, then finish the front with color-matched gel coat.
- Paint and caulk: Re-caulk the fixture-to-wall seam with a mold-resistant silicone, and touch up paint before the unit goes back into service.
Reducing Maintenance Labor Costs with Standardized Kits
Labor cost in student housing maintenance is driven by variables such as trips to the unit, trips to the supply house, and callbacks. A standardized kit program can help address these.
Where the labor actually goes
A single leaky faucet repair has a fixed labor floor, travel, setup, shutoff, disassembly, reassembly, test, plus variable labor driven by surprises. The fixed portion is roughly the same whether the job takes 25 minutes or 90; the variable portion can impact budgets significantly:
- Missing part on the truck. The tech reassembles, drives to the supply house, drives back, and re-opens the unit.
- Mismatched cartridge. The part fits the brand but not the model. The drip continues, the resident files another work order, and the callback can consume additional labor.
- Seized valve with no puller on hand. The tech improvises with pliers, snaps the stem, and converts a cartridge swap into a valve replacement with wall access.
- No access door in stock. The wall stays open, the unit fails inspection, and the close-out becomes its own work order.
What a standardized kit should contain
A kit that helps prevent callbacks can cover the failure modes above, not just the cartridge:
| Failure mode | Kit component | Why it matters |
|---|---|---|
| Worn cartridge | OEM-matched cartridge for the unit's faucet brand and model | Eliminates the mismatch callback |
| Failed seal | Fresh O-rings and gaskets sized to the cartridge | The O-ring usually fails before the cartridge does |
| Seized cartridge | Cartridge puller tool (shared across the crew) | Prevents snapped stems and cracked bodies |
| Thread leaks on supply lines | Teflon tape and pipe dope | Stops the second-most-common drip source |
| Stiff handle after repair | Plumber's grease | Restores smooth operation and prevents a "still broken" callback |
| Open wall after access | Correctly sized access door | Closes the unit out inspection-ready |
Standardizing across a portfolio
- Audit the installed base first. Walk a sample of units and record the faucet brand and model at each fixture. Some portfolios may find more repetition than expected.
- Standardize on replacement fixtures going forward. When a valve fails beyond repair, replace it with a model you have already kitted. Over a few years, the installed base collapses to a handful of SKUs.
- Keep a small tile and paint stock. Matching finishes after the fact can be an expensive part of a wall close-out.
- Track callbacks by part number. If one cartridge SKU generates repeat work orders, it may indicate a problem with the part.
Ready Bathroom Solutions builds pre-kitted, OEM-grade repair sets with parts from brands like Moen, Delta, and BrassCraft. One box holds the cartridge, seals, and small consumables, so techs stop guessing and start fixing. The PROFLO 1/4 in. bibb washer is a good example of the consumable layer: a low-cost part that stops drips on compression-style faucets and belongs in every standard kit. Paired with a brand-matched cartridge and fresh O-ring, it covers the overwhelming majority of drip calls without a second trip.

Conclusion
A leaky faucet in student housing can become a larger problem, it wastes water, can damage finishes, and may pull your team off other jobs. The fix is simple with the right parts and a clear process.
Frequently Asked Questions
Can I fix a leaky bathroom faucet without replacing the whole unit?
Yes. Most drips come from a worn cartridge, O-ring, or washer. Replacing just the cartridge or O-ring costs far less than a new faucet and takes about 20 minutes. For student housing, keep OEM-grade cartridges like the Delta RP75786 on hand. If the valve body is cracked or corroded, then a full replacement is needed. Start with the cartridge first; it solves most leaks.
How do I identify the faucet model in my student housing unit?
Look under the sink or behind the faucet for a brand stamp. Delta, Moen, and BrassCraft are common. Remove the handle and check the cartridge shape. Take a photo and match it to supplier catalogs. For portfolio consistency, standardize on one or two models across all units so your team always knows which parts to grab.
What tools are essential for standardizing bathroom sink repairs?
A basic kit includes an adjustable wrench, hex key set, Phillips and flat-head screwdrivers, spanner wrench, plumber's grease, Teflon tape, and a towel. For commercial properties, add a cartridge puller. Pre-kitted sets from Ready Bathroom Solutions include OEM-grade parts like the Delta RP75786 cartridge and RP2055 O-ring, so techs avoid store runs and finish faster.
How can property managers reduce maintenance callbacks for sink leaks?
Use OEM-grade cartridges, not generic ones. Train techs to clean the valve body and apply plumber's grease to O-rings. Stock pre-kitted parts so every repair uses the same components. This reduces repeat visits. Ready Bathroom Solutions kits bundle the right parts, cutting labor hours and preventing after-hours emergencies. Standardization across units also speeds up diagnosis.