

Table of Contents
- What John Guest Push Fit Fittings Are and Why Property Teams Use Them
- Understanding John Guest Fitting Sizes and Compatibility
- How to Install John Guest Push-Fit Fittings Correctly
- Removing John Guest Push-Fit Fittings: Tools and Technique
- Building a Bulk Push-Fit Fittings Inventory Strategy
- Genuine John Guest Fittings vs. Aftermarket Alternatives
- Preventing Leaks and Ensuring Reliable Performance
- Frequently Asked Questions
Last Updated: October 10, 2026
What John Guest Push Fit Fittings Are and Why Property Teams Use Them
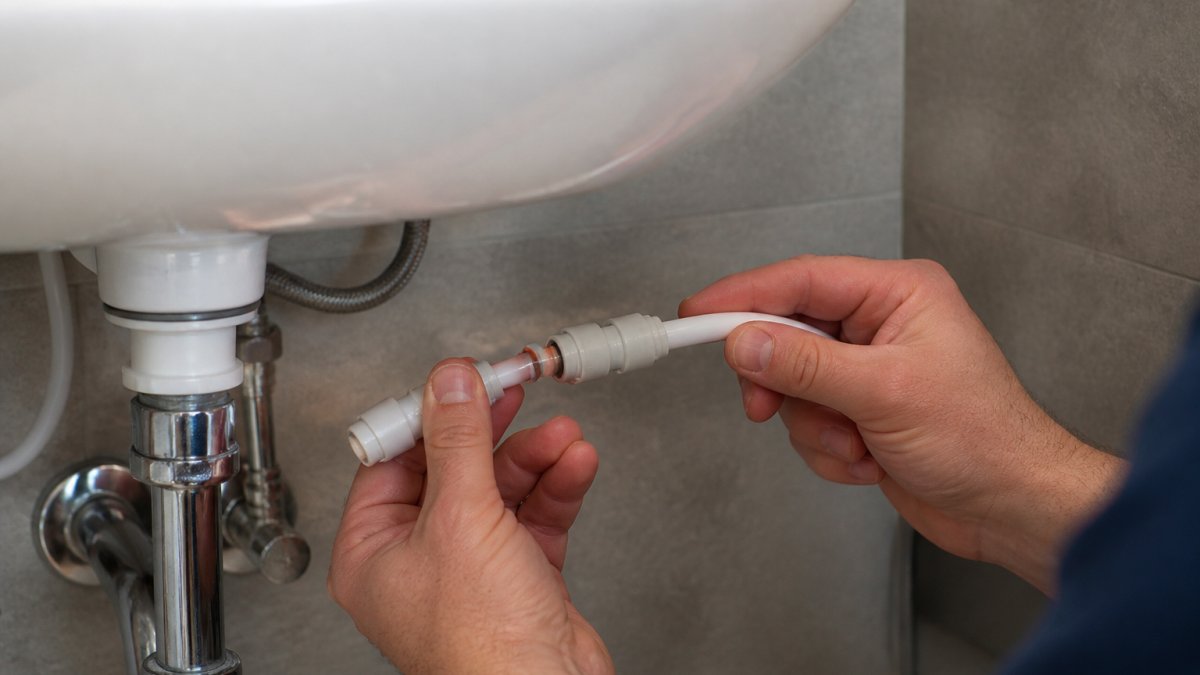
John Guest push fit fittings are compression-based connectors that join water supply tubing without soldering, crimping, or special tools. They work by inserting tubing into a fitting body where internal collets grip and seal the connection. For property teams managing multiple units across hotels, apartments, and student housing, John Guest push fit fittings eliminate the complexity and time associated with traditional plumbing methods.
The real advantage isn't just speed, it's consistency. When you're turning over 20 units a month across five properties, standardized components mean less guesswork and fewer callbacks. Your maintenance team doesn't need specialized plumbing skills to make reliable connections that hold up under pressure.
Property managers appreciate John Guest push fit fittings because they work with standard tubing sizes and don't require heat, flux, or certification. A facilities manager can stock the same components across an entire portfolio, train staff once, and execute repairs consistently.
Understanding John Guest Fitting Sizes and Compatibility
John Guest push fit fittings come in standard tubing sizes: 3/8-inch, 1/2-inch, and 5/8-inch outer diameter (OD). The size you need depends on your water supply line diameter, not the fitting type. Mixing sizes creates leaks; a 1/2-inch tubing inserted into a 3/8-inch fitting won't seal properly, and forcing it risks damaging the internal collet mechanism.
Identifying Your Current Fitting Size
Measure the outer diameter of the tubing connected to your current fitting using a ruler or calipers. If tubing is wrapped in insulation, peel back a small section to measure the bare tubing beneath.
Many John Guest fittings have the size printed on the body (e.g., "1/2"). If the marking is worn or absent, compare your tubing to a known reference: 1/2-inch tubing is roughly the diameter of a pencil, while 3/8-inch is noticeably thinner.
Pressure and Application Compatibility
Standard John Guest fittings handle residential pressures up to 100 PSI. Verify your system pressure before ordering if your property uses a booster pump, has experienced repeated fitting failures, or if your water main pressure exceeds 80 PSI. If pressure exceeds 100 PSI, order high-pressure rated John Guest fittings (150 PSI rated).
Pre-Purchase Compatibility Checklist
Before ordering replacement fittings, verify these four factors to avoid returns and installation delays:
1. Tubing Size Match
- Measure the outer diameter of your current tubing (3/8", 1/2", or 5/8")
- Confirm the fitting matches this size exactly
2. Fitting Type and Configuration
- Identify whether you need a straight connector, elbow, tee, or shut-off valve
- Note the connection orientation and port sizes
3. System Pressure Verification
- Contact your local water utility or install a pressure gauge on an outdoor faucet to measure your actual pressure
- If pressure exceeds 100 PSI, order high-pressure rated fittings
4. Material and Finish Compatibility
- John Guest fittings are typically polished chrome or nickel-plated brass
- Verify the finish matches your existing installation
- If your tubing is PEX, confirm the fitting is rated for that tubing type
Why Brand Consistency Matters
John Guest fittings are designed for John Guest tubing. Mixing brands creates compatibility issues: seals may not engage properly and collet mechanisms may not grip reliably. Generic push-fit fittings use different internal collet designs and tolerances, resulting in higher failure rates and more callbacks. Stick with one brand ecosystem across your portfolio to ensure predictable performance.
How to Install John Guest Push-Fit Fittings Correctly
Step-by-Step Installation Process
Installing a John Guest push fit fitting takes under five minutes. Cut your tubing square using a tubing cutter, a clean, perpendicular cut is critical because angled cuts won't seat properly. Deburr the cut end with a small file to remove sharp edges that could damage internal seals.
Insert the tubing straight into the fitting body and push firmly until you feel resistance (typically 1/4 to 1/2 inch). The tubing should not wiggle or rotate once seated. If it does, remove it, check for debris, and try again.
Test the connection by applying moderate hand pressure, you shouldn't be able to pull the tubing out without deliberate force. If tubing slides out easily, remove and reinsert. Once seated, turn on the water and inspect for leaks.
Common Installation Mistakes to Avoid
The biggest mistake is inserting tubing at an angle, angled tubing doesn't seat the collet evenly, creating a weak seal. Always use a tubing cutter and ensure the cut is perpendicular. Reusing old tubing is another error; install fresh tubing when replacing a fitting. Finally, don't force tubing into a mismatched fitting, if tubing doesn't insert smoothly, stop and verify the fitting size.
Removing John Guest Push-Fit Fittings: Tools and Technique
Removing a John Guest push fit fitting requires a plastic removal tool (under $5). Insert the tool around the fitting, push it toward the fitting body, and simultaneously pull the tubing straight out. Without a removal tool, you risk damaging the fitting or tubing. Don't twist, wiggle, or force the tubing, order a removal tool before attempting removal.
Building a Bulk Push-Fit Fittings Inventory Strategy
Calculating Stock Levels Across Multiple Properties
Calculate your baseline by multiplying monthly unit turns by the average number of fittings replaced per unit. If you turn 15 units monthly and replace 3 fittings per unit, you need 45 fittings per month. Add 20-30% for emergency repairs. Standardizing on John Guest push fit fittings reduces SKU complexity and ensures consistency in installation quality.
Reusability and Cost Efficiency
John Guest fittings are not reusable once removed, but tubing can often be recut and reused if damage is minor. Buying push-fit fittings in bulk reduces per-unit cost significantly and cuts labor hours spent on supply runs.
Genuine John Guest Fittings vs. Aftermarket Alternatives
Genuine John Guest fittings carry higher upfront cost than generic alternatives, but the difference in reliability justifies the investment. Aftermarket fittings often use lower-grade materials and looser tolerances, resulting in higher failure rates. Genuine John Guest fittings deliver predictable performance across your entire portfolio.
Preventing Leaks and Ensuring Reliable Performance
Diagnosing Leaks: Symptom to Part Identification
Most property managers know they have a leak, but identifying which fitting is failing and what part to order is the real challenge. Use this symptom-to-diagnosis guide to pinpoint the problem before ordering replacement parts.
Leak at the base of a sink or fixture (dripping from underneath)
- Likely culprit: Shut-off valve or supply line connection at the fixture inlet
- Part to replace: Shut-off valve (if the leak is at the valve body itself) or the push-fit connector where tubing enters the fixture
- Verification: Turn off the shut-off valve; if the leak stops, the valve is faulty. If it continues, the problem is upstream in the supply line
Leak at a visible fitting connection (water dripping from where tubing meets the fitting)
- Likely culprit: Improper tubing insertion, debris inside the fitting, or a damaged tubing end
- Part to replace: Often none, this is usually a reinstallation issue. Remove the tubing, inspect the fitting interior for debris or mineral buildup, clean if necessary, cut fresh tubing, and reinsert
- If leaking persists after reinstallation: Replace the fitting itself, as the internal collet may be damaged
Slow drip or weeping from a tee or elbow in the middle of a supply line
- Likely culprit: Pressure stress, mineral deposits on the collet, or a fitting that's nearing end of life
- Part to replace: The tee or elbow fitting
- Verification: If the leak occurs only during peak water usage (morning showers, multiple fixtures running), pressure stress is the cause, consider upgrading to high-pressure rated fittings
Water pooling inside cabinets or behind walls (no visible drip point)
- Likely culprit: A hidden fitting connection or a slow leak that's been running for hours
- Part to replace: Depends on location, but typically a tee or elbow buried in the wall or under the sink
- Action: Trace the supply line to locate the hidden fitting, then follow the diagnosis steps above
Low water pressure at one fixture only
- Likely culprit: Mineral buildup inside a fitting or a partially blocked shut-off valve
- Part to replace: The affected fitting or shut-off valve
- Verification: Remove and inspect the fitting; if mineral deposits are visible, clean or replace. If the shut-off valve is partially closed, open it fully
Low water pressure at all fixtures
- Likely culprit: Mineral buildup in the main supply line or a failing pressure regulator (not a John Guest fitting issue)
- Part to replace: Typically not a fitting, this requires a plumber to inspect the main line or regulator
Installation Best Practices to Prevent Leaks
Leaks at push-fit connections typically stem from three causes: improper insertion depth, dirty or damaged tubing ends, and mismatched tubing size. Address each during installation.
Cut tubing cleanly. Use a tubing cutter to ensure a perpendicular cut. Angled or jagged cuts won't seat the collet evenly, creating a weak seal that fails under pressure.
Inspect and deburr the tubing end. After cutting, run a small file or deburring tool around the cut edge to remove any sharp burrs. Burrs can damage the internal seals during insertion.
Verify size compatibility before insertion. Confirm the tubing diameter matches the fitting size. If tubing doesn't insert smoothly, stop. Forcing creates internal damage that makes the fitting unusable.
Insert tubing straight and fully. Push tubing into the fitting body until you feel resistance, typically 1/4 to 1/2 inch of insertion depth. The tubing should not wiggle or rotate once seated. If it does, remove it, check for debris inside the fitting, and try again.
Test the connection immediately. Apply moderate hand pressure, you shouldn't be able to pull the tubing out without deliberate force. If tubing slides out easily, the connection didn't seat properly. Remove and reinsert.
Pressure Testing Before Occupancy
Pressure testing before occupancy prevents leaks from reaching residents. After installing new fittings, pressurize the system to 80 PSI for 15 minutes and inspect all connections for drips. This simple step catches most installation errors before units go back into service.
To pressure test:
- Close all shut-off valves at fixtures
- Attach a pressure gauge to an outdoor faucet or test port
- Turn on the main water supply and allow the system to pressurize
- Walk the entire supply line and inspect every fitting for drips or weeping
- Document the test in your maintenance records, this protects your property if a leak occurs later and a resident claims it was pre-existing
Routine Maintenance and Early Detection
Maintenance teams should inspect John Guest fittings during routine unit turns. Look for:
- Visible corrosion or discoloration on the fitting body
- Mineral deposits (white or tan buildup) around the connection point
- Slow drips or moisture stains on tubing or the fitting
- Tubing that feels soft or degraded when squeezed gently
Early detection prevents catastrophic failures. A fitting showing signs of wear should be replaced proactively rather than waiting for a failure. This is especially important in high-turnover properties where a mid-week leak can delay unit occupancy and create tenant complaints.
For properties with hard water (high mineral content), inspect fittings every 6-12 months. Mineral buildup accelerates collet wear and can reduce fitting lifespan compared to soft-water areas.
Frequently Asked Questions
What are John Guest push-fit fittings used for in property maintenance?
John Guest push-fit fittings connect water supply lines, drainage systems, and hot water circulation in bathroom fixtures without requiring solder or special tools. Property maintenance teams use them for quick repairs and replacements in apartments, hotels, and student housing because they reduce labor time and eliminate callbacks from improper connections. They work with standard tubing sizes.
How do you choose the right size John Guest fitting for your repair?
John Guest fitting sizes are measured by tubing outer diameter. Check your existing tubing or the manufacturer's specification sheet for your faucet model. Measure the outer diameter of the tubing with a caliper if unsure. Ordering the wrong size wastes time and forces a return trip, so verify before bulk ordering.
Can you reuse John Guest push-fit fittings after removal?
John Guest fittings can be removed correctly using the proper removal tool. However, always inspect the fitting and tubing end for damage before reinstalling to prevent leaks.
What's the difference between genuine and aftermarket push-fit fittings?
Genuine John Guest fittings meet strict tolerances and seal reliability standards, reducing leak callbacks and repeat service calls. Aftermarket alternatives may have looser tolerances or lower-quality internal seals. For property teams managing multiple units, genuine OEM-grade fittings eliminate the hidden cost of callbacks and reputational risk.