

Last Updated: November 4, 2026
Quick Summary
To verify plumbing part compatibility, start with the fixture's model number and serial number, then compare them with the manufacturer's parts list. Before you buy, measure the existing part's thread size, fitting dimensions and spline count so you can confirm a match even when the label is missing.
- Find the model and serial number on a label, stamped plate or inside the tank or cover.
- Use a thread pitch gauge to identify threads per inch before ordering.
- Measure supply tube outside diameter with a caliper, not a tape measure.
- Look for NSF/ANSI or IAPMO marks showing the part meets a plumbing standard.
- Photograph and measure discontinued parts, then bring those details to a supplier.
Table of Contents
- Why Compatibility Checks Prevent Costly Callbacks
- Start With the Fixture's Model Number and Serial Number
- Measure Thread Size, Fitting Dimensions and Spline Count
- Identifying OEM Plumbing Parts and Checking Certification Marks
- Matching Legacy and Discontinued Fixtures
- Universal Versus OEM Parts: Trade-offs for Property Teams
- Why All-in-One Kit Toilets Simplify Verified Repairs
- Booking Your Next Verified Repair Kit
- Frequently Asked Questions
Why Compatibility Checks Prevent Costly Callbacks
Buying the wrong plumbing part wastes money and time, so confirming plumbing part compatibility before you order matters. A part that looks right can still leak, fail to seat, or void a manufacturer's warranty.
A quick check before purchase stops most callbacks. Most of the trouble starts with a part that was close enough to look correct but not built for the fixture.
Watch out: A part that fits by eye can still have the wrong thread pitch. Test the connection before you rely on it.
Start With the Fixture's Model Number and Serial Number
The model number is the fastest way to confirm compatibility. Most fixtures carry it on a label, a stamped plate or inside the tank or cover.
Write the model and serial number down before you search. Then check the manufacturer's documentation for the exact replacement parts listed for that model.
- Look under the tank lid, behind the access panel or on the back of the fixture
- Note the serial number if the model number is missing or worn
- Compare both against the manufacturer's parts list
Measure Thread Size, Fitting Dimensions and Spline Count
Labels and model plates get you close, but measurements are what confirm a match when the label is missing, worn, or the fixture has been repaired with aftermarket parts. Measure the existing part, not the new one, and record every number before you search.
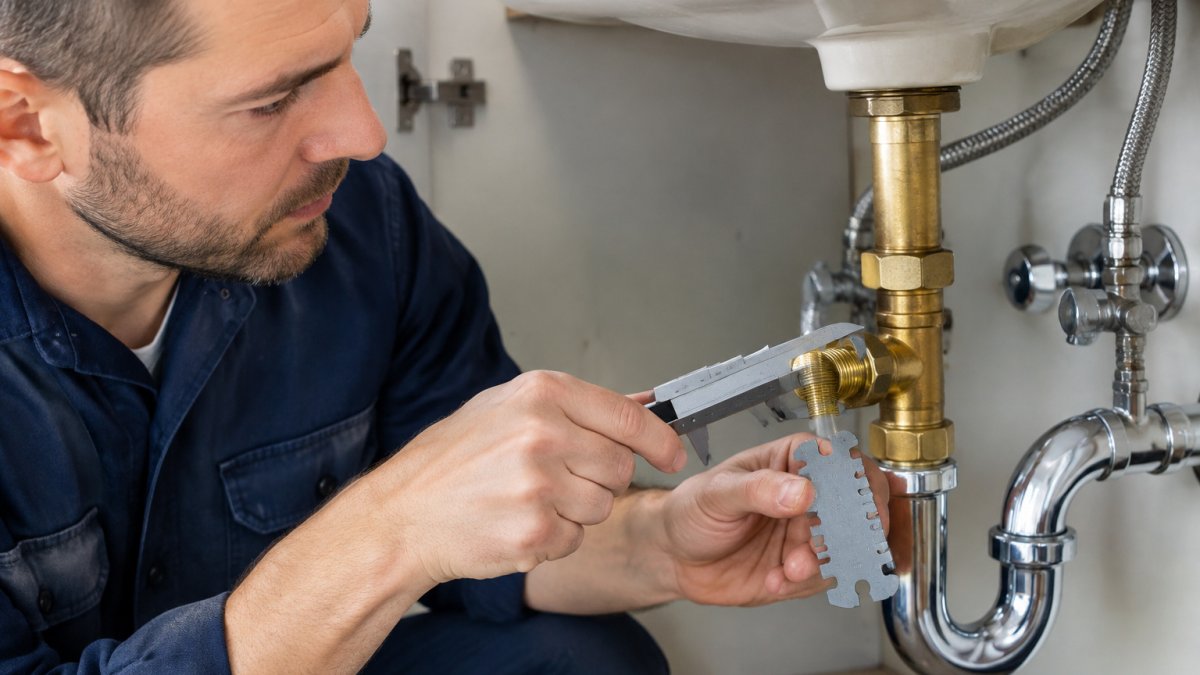
Threads. Most supply and drain connections in residential plumbing use NPT (National Pipe Taper) threads, where the diameter tapers and the threads seal by interference. NPT sizes are nominal, not actual: a 1/2-inch NPT fitting measures about 0.84 inch across the outside of the male thread. Use a thread pitch gauge to identify threads per inch (TPI), common sizes are 1/2-inch NPT at 14 TPI and 3/8-inch NPT at 18 TPI. Do not substitute NPS (straight) for NPT (tapered) on a sealing connection; the joint will not tighten.
Compression fittings. Measure the outside diameter of the supply tube with a caliper, not a tape measure. Standard outside diameters are 3/8 inch, 1/2 inch, and 5/8 inch for fixture supplies. The nut and ferrule must match that tube size; a 1/2-inch nut on a 5/8-inch tube will not compress the ferrule correctly.
Spline count. For faucet handles and valve stems, count the splines (teeth) on the stem where the handle seats. Common counts are 16, 18, 20, and 24; a mismatch lets the handle spin or strip. Count twice and photograph the stem end-on so the count is visible.
Flanges and rough-in dimensions. For toilets, measure the rough-in, the distance from the finished wall to the center of the closet flange bolts. Standard rough-ins are 10, 12, and 14 inches; a 12-inch toilet on a 10-inch rough-in will not seat against the wall.
Cartridge dimensions. For single-handle and two-handle valves, measure cartridge length, diameter, and the position of the locating lugs. A cartridge that is 1/8 inch too long will not seat, and one with lugs in the wrong position will not index into the valve body.
Watch out: A part that threads on by hand can still have the wrong pitch and leak under pressure, always confirm TPI with a gauge before you install.
Use a caliper for diameters, a thread gauge for pitch, and a notebook or phone photo for every measurement. Bring those numbers to the supplier; they are the difference between a one-trip repair and a return.
Identifying OEM Plumbing Parts and Checking Certification Marks
OEM parts come from the original manufacturer. Universal parts can work, but they need closer checking to confirm plumbing part compatibility with the fixture.
Look for certification marks on the part body. In the United States, marks from listing agencies such as NSF/ANSI or IAPMO show the part meets the relevant plumbing standard. Check the spec sheet for material composition and pressure rating.
Compare the part's visual finish and material with the original. A part that looks very different may be a knock-off.
Matching Legacy and Discontinued Fixtures
Older and discontinued fixtures are where most compatibility checks fail, because the manufacturer may no longer list the part, the model plate may be painted over, and the fixture may have been repaired with aftermarket parts years ago. The workaround is to identify the part by its physical and dimensional signature rather than by model number alone.
Start with the fixture's age. Date the fixture from the shutoff valves, the supply lines, and the finish. A toilet with a brass ballcock and a 4-bolt tank-to-bowl connection is likely pre-1990s; a faucet with a plastic cartridge and a ceramic disc valve is likely 1990s or later. Age narrows the parts catalog before you measure anything.
Photograph and measure the existing part. Take photos from the top, side, and bottom, plus a close-up of any stamped numbers or logos on the part body. Measure the cartridge length and diameter, the stem spline count, the thread pitch, and the distance between mounting holes. Write the numbers down; a supplier can match a part from dimensions even when the model number is gone.
Sealant Pack (PTFE Tape) - PROSELECT® 3/4 in. x 520 in. White PTFE Pipe Thread →
Look for cross-reference numbers. Many OEM cartridges and stems carry a manufacturer part number stamped on the body, and aftermarket makers publish cross-reference charts that map OEM numbers to their equivalents. Search the stamped number, not the fixture model, and confirm the cross-reference against the dimensions you measured.
Check rebuild kits before replacing the valve. For older faucets and valves, a rebuild kit (seats, springs, O-rings, and cartridge) is often available even when the complete valve is discontinued. Rebuilding preserves the existing rough-in and avoids opening the wall.
When the part is truly obsolete. If no cross-reference exists, a plumbing supply house that serves repair contractors is more likely than a big-box store to have a match or to identify the part from a photo.
Watch out: A discontinued part that looks identical can differ in stem length or spline count by a fraction of an inch, measure the old part before you accept a visual match.
For property teams, keep a photo and measurement record for every legacy fixture on site. That record turns a future repair from a research project into a parts order.
Measurements and dimensions identify a legacy part when the model number is no longer usable, so record these before ordering.
| Check | What to record | Why it matters |
|---|---|---|
| Fixture age | Shutoff valves, supply lines, finish | Narrows the parts catalog |
| Photos | Top, side, bottom, stamped numbers | Lets a supplier match the part |
| Cartridge | Length and diameter | Confirms the part seats |
| Stem | Spline count | Prevents handle slipping or stripping |
| Threads | Pitch | Prevents leaks under pressure |
| Mounting | Distance between holes | Confirms fit to the body |
| Cross-reference | Stamped OEM number | Maps to an equivalent part |
Universal Versus OEM Parts: Trade-offs for Property Teams
For a property team, the right choice depends on volume and risk.
For budgeting repairs, see our Bathroom Repair Kit Cost Analysis for Property Managers. It compares the two options.
Why All-in-One Kit Toilets Simplify Verified Repairs
An all-in-one kit toilet reduces guesswork because its parts are matched to one model.
Genuine components help too. For example, the acoustic insulation set from GEBERIT MANUFACTURING INC is a genuine replacement part for maintaining proper toilet function and appearance.
Booking Your Next Verified Repair Kit
Verify the model number, measure the fittings and confirm the certification marks before every order. That check takes minutes and prevents most callbacks.
Shop All Bathroom Kits to see what is available for your properties.
Frequently Asked Questions
How do I check if a plumbing part is compatible? Start with the fixture's model number and serial number. Compare them with the manufacturer's parts list, then measure thread size and fitting dimensions before buying.
What does a certification mark mean on a plumbing part? A certification mark from a listing agency shows the part was tested against a recognized plumbing standard. Check the mark against the part's spec sheet.
Is a universal part as good as an OEM part? It can be, when the fitting sizes and materials match exactly. OEM parts are the safer choice for valves and cartridges.
What should I do if the model is discontinued? Photograph the part, record its measurements and bring those details to a supplier for a match.
Frequently Asked Questions
How do I identify a plumbing part without a part number?
Start by photographing the part from several angles and noting any stamped text, brand logos or markings on the body. Then measure the inlet and outlet sizes, the thread type and the overall length. Compare those measurements against the manufacturer's spec sheet or a parts catalog. If the fixture's model number is available, look up the original installation documentation, which often lists the compatible replacement parts. Verifying dimensions before you order is the step that prevents most wrong-part returns.
How can I tell if a replacement part is OEM-grade?
Check the packaging and the part body for the manufacturer's name, a model or part number, and a certification mark such as an NSF/ANSI 61 listing for parts that contact drinking water. When a listing does not show a manufacturer part number or material composition, treat that as a reason to verify further before installing.
What tools are needed to measure plumbing parts for compatibility?
A digital caliper handles most fitting and gasket measurements, and a thread gauge or pitch gauge confirms thread size and type. A tape measure is useful for overall length and rough-in distance. Keep a notepad or phone app to record dimensions for each fixture in your portfolio. Recording these measurements once per fixture model lets your team match future repairs quickly and reduces the number of trips to the supply house.
What are the benefits of all-in-one kit toilets for maintenance teams?
All-in-one kit toilets bundle the seal, supply line, and related fittings that match a specific fixture into one box. Because the components come together in one box, technicians spend less time sourcing parts across several stores. For property teams managing multiple units, standardized kits can help reduce repeat visits.
