

Last Updated: October 28, 2026
Quick Summary
Automate move-out inspections by building a reusable room-by-room checklist in mobile inspection software, requiring photos for any damage, and triggering work orders and deposit reviews automatically when the inspector submits the form. This removes the retyping and photo-filing delays that slow unit turnover.
- Build one room-by-room checklist template and reuse it across all units.
- Require a photo for any item marked damage, so deposit disputes have evidence.
- Route each damage finding to the right trade as an automatic work order.
- Set the deposit review due date to fall before your state's return deadline.
- Track median inspection time and vacancy days to measure whether automation works.
Table of Contents
- Why Manual Move-Out Inspections Slow Down Your Turns
- Building an Apartment Move-Out Inspection Checklist That Works in the Field
- Choosing Digital Property Inspection Software and Connecting It to Your Workflow
- Setting Up the Automated Workflow: Templates, Triggers and Task Assignment
- Capturing Photos, Notes and a Move-Out Inspection Report Template
- Turning Findings Into Make-Ready Work Orders and Deposit Decisions
- Tracking Metrics and Legal Safeguards to Keep Automation Compliant
- Setting Up Your Apartment Turnover Checklist for the Next Unit
- Frequently Asked Questions
Why Manual Move-Out Inspections Slow Down Your Turns
Most property teams treat move-out inspections as a paperwork chore. A clipboard, a flashlight and a few hours later, the findings sit in a folder until the next vacancy. That delay costs money every day the unit stays empty.
The inspection itself is rarely the slow part. The slow part is everything that happens after: typing up notes, sorting photos, sending a list to the maintenance lead and waiting for someone to schedule the repairs.
Manual inspections create three common bottlenecks:
- Handwritten notes that need retyping. Someone has to translate scribbles into a usable report.
- Photos stored on phones. Pictures get lost, mislabeled or never attached to the right room.
- Findings that wait for a person to act. A bathroom fixture problem sits until someone remembers to order the part.
Building an Apartment Move-Out Inspection Checklist That Works in the Field
A checklist is only useful if the inspector can finish it standing in the unit.
Start with a short list organized by room. Keep each item to a yes-or-no check or a simple rating. Cover the exterior and entry first, then walk through each room in the same order every time. Consistency matters more than detail.
A checklist can cover:
- Entry and exterior: doors, locks, keys returned and visible damage
- Walls and flooring: scuffs, holes, stains and worn spots
- Bathroom: sink, tub, toilet, caulk, exhaust fan and fixtures
- Kitchen: appliances, cabinets, counters and plumbing under the sink
- Smoke detectors and safety items: working and in place
Distinguish normal wear and tear from tenant-caused damage on the form itself. A simple "wear" or "damage" option saves arguments later about what counts.
Choosing Digital Property Inspection Software and Connecting It to Your Workflow
Paper checklists can be turned into digital forms on a phone or tablet. The goal is one tool that does three jobs: runs the checklist, stores time-stamped photos and sends findings to whoever fixes them.
When comparing options, look for these features:
- Offline use, since many vacant units have weak signal
- Customizable checklist templates you can reuse across properties, and bathroom repair kits that match the standardized fixes you define.
- Time-stamped photo capture tied to specific rooms
- Automatic report generation as a PDF
- Connections to your existing work order or maintenance system
Confirm the software can pass completed findings directly into your work order process. If your team still re-enters data by hand, the automation stops at the inspection and the bottleneck simply moves downstream.
Setting Up the Automated Workflow: Templates, Triggers and Task Assignment
Automation works best when each step starts the next one without a manual reminder. The difference between a workflow that saves time and one that just moves the bottleneck is how specifically you configure the triggers, templates, and assignment rules. Below is a practical, software-neutral setup you can adapt to most mobile inspection tools and property-management systems.
Start with a reusable room-by-room template
- Entry and exterior: door operation, locks, peephole, house numbers, porch light, visible damage
- Living areas: walls (scuffs, holes, stains), flooring (wear, tears, stains), windows and blinds, outlets, light fixtures
- Kitchen: appliances (test each one), cabinets and drawers, counters, sink and plumbing, exhaust fan, caulk and grout
- Bathroom: toilet (flush and seat), sink and faucet, tub/shower and caulk, exhaust fan, fixtures, water damage signs
- Bedrooms: closet doors and shelves, windows, walls, flooring, smoke detector
- Safety and systems: smoke and carbon monoxide detectors, HVAC filter, water heater visible condition, breaker panel access
Add conditional fields and required-photo rules
A flat checklist invites skipped evidence. Configure the form so that selecting "Damage" or "Missing" on any line item reveals a required notes field and a required photo capture. Set a minimum of one wide shot per room and one close-up per flagged item. Many mobile inspection tools support this natively; if yours does not, use a required "photo attached" yes/no field as a fallback.
Wire the triggers
A typical setup looks like this:
- Move-out date entered: The tenant's notice or lease end date is recorded in the property-management system.
- Inspection task created: The system generates an inspection task with the correct template for that unit type, assigned to the scheduled inspector, with a due date two to three business days before the move-out date.
- Reminder trigger: An automated reminder fires 24 hours before the scheduled inspection to the inspector and, where your process allows tenant attendance, to the tenant.
- Submission trigger: When the inspector submits the form, the system generates a PDF report, timestamps it, and attaches all photos to the unit record.
- Findings routing: Each line item marked "Damage" or "Repair needed" creates a work order or task, routed by trade (plumbing, electrical, painting, cleaning) to the correct person or vendor, with the photo and room location attached.
- Deposit review trigger: Items flagged as potential tenant-caused damage route to the person who prepares the deposit disposition, with a due date that respects your state's deposit-return deadline.
Assign by role, not by name
Assign tasks to roles (lead maintenance tech, make-ready coordinator, vendor) rather than individuals. For guidance on preparing staff for these steps, read how to train maintenance staff on new workflows. When someone is out, the task still routes correctly. Most property-management systems support role-based assignment; if yours does not, use a shared queue with a daily owner check.
Test before rollout
Run a live walkthrough with two or three real units before rolling the process out to everyone. Keep the first sessions short and focused on the screens your team will actually use. A common mistake is assuming people will learn the system by poking around on their own. Build a one-page quick reference for the three actions inspectors perform most: start inspection, capture photo, submit report.
Capturing Photos, Notes and a Move-Out Inspection Report Template
Take photos as you go, not at the end when the unit is partly cleaned.
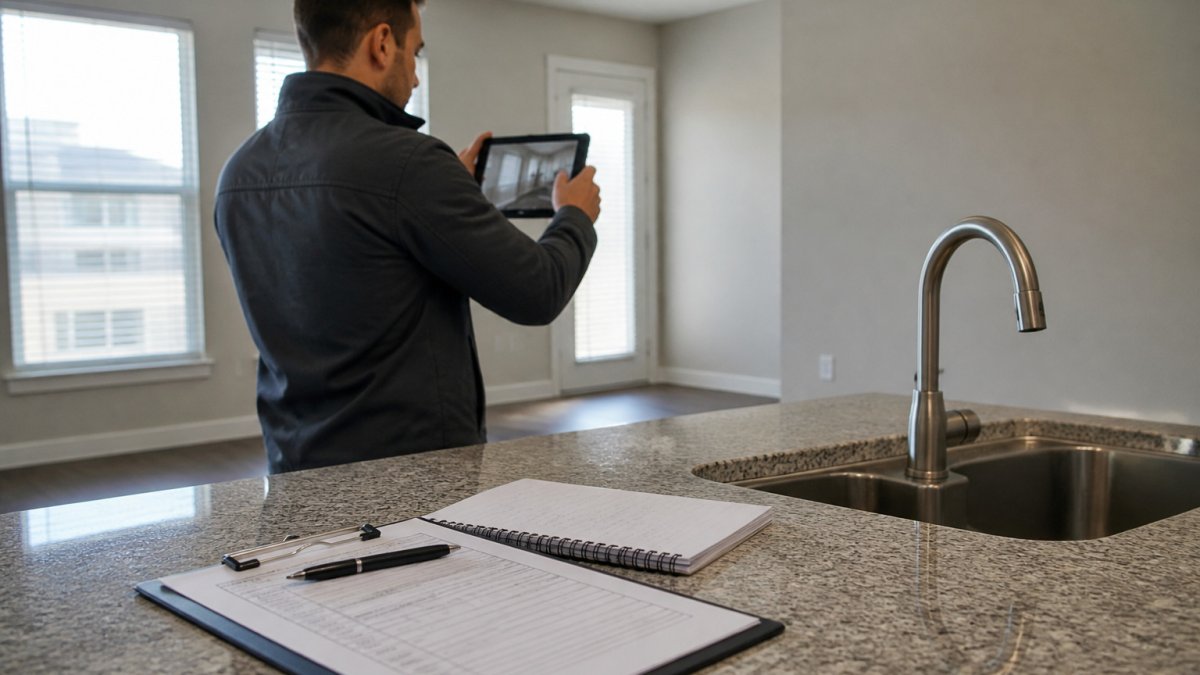
Use a simple rule: one wide shot of each room, then close-ups of any damage. Keep notes short and specific. "Hole in bedroom wall, roughly 4 inches, near door" is far more useful than "wall damage."
The article's photo rule is simple enough to capture in a short table.
| Shot type | How many | Why |
|---|---|---|
| Wide shot | One per room | Shows the room as a whole |
| Close-up | One per damaged item | Documents the specific damage |
| Note length | Short and specific | Says where and how big the damage is |
Turning Findings Into Make-Ready Work Orders and Deposit Decisions
Our pre-kitted bathroom repair kits consolidate necessary parts into a single box.
For deposit decisions, keep the inspection photos and notes with the tenant file. Check your local rules before deducting for wear that may fall under normal use.
Tracking Metrics and Legal Safeguards to Keep Automation Compliant
To assess your process, track a small set of operational metrics with clear definitions, and pair them with legal safeguards.
Operational metrics that show whether automation is working
Define each metric the same way every time so you can compare results. A starter set:
-
Inspection completion time: Minutes from inspector arrival to form submission. Track the median, not the average, to avoid outliers skewing the picture.
-
Rework rate: Percentage of work orders that require a second visit because the finding was incomplete or the wrong trade was assigned.
-
Vacancy days: Calendar days from move-out to unit ready-for-move-in. This is the metric that ties inspection speed to revenue.
-
Cost per turnover: Total make-ready spend divided by units turned. Compare like-for-like unit types.
-
Deposit dispute rate: Percentage of move-outs where the tenant contests a deduction.
Legal safeguards to build into the workflow
Deposit and notice rules vary by state and sometimes by municipality, so confirm the specifics with a qualified attorney or your property management counsel before finalizing your forms. That said, a few safeguards are broadly useful and can be configured directly into most inspection workflows:
- Notice and scheduling: Many states require written notice before entry for inspection. Build the notice step into the trigger sequence so the inspection cannot be scheduled without a recorded notice date.
- Tenant attendance: Some jurisdictions give tenants a right to be present at the move-out inspection. Where that applies, add an attendance field and a place to record whether the tenant attended or waived the right.
- Deposit-return deadlines: Most states set a deadline (commonly ranging from 14 to 30 days, but verify your state's rule) for returning the deposit or an itemized statement. Configure the deposit review trigger with a due date that leaves buffer before the deadline.
- Itemized deductions: Attach the photo and the specific line item to every deduction. A deduction without evidence is the most common reason a deposit decision is reversed.
- Evidence retention: Keep the signed report, photos, and notice records for at least the period your state requires, and longer if your counsel advises. Store them in the unit record, not on an inspector's phone.
- Normal wear vs. damage: Use the form's "wear" versus "damage" field consistently, and have a second reviewer check any deduction that could be argued as normal wear.
Put the two together
The metrics tell you whether the workflow is fast and clean; the safeguards tell you whether it is defensible. Review both in the same monthly meeting so speed gains never come at the cost of documentation quality.
Setting Up Your Apartment Turnover Checklist for the Next Unit
Once the move-out inspection is automated, connect it to your turnover checklist. The inspection findings should feed directly into the list of tasks for the next move-in.
Keep the turnover checklist in the same order as the inspection so nothing is missed. Assign tasks by role: cleaning, painting, plumbing and final walkthrough. Set a target completion date for the unit and track actual results against it.
Review the checklist every few months. Add items your team keeps catching and remove steps that never find anything. A checklist that changes with your portfolio stays useful, while one left untouched slowly stops matching how your units actually wear.
Frequently Asked Questions
What do apartments look for in a move-out inspection?
Inspectors look for damage that goes beyond normal wear and tear, such as holes in walls, stained or torn flooring, broken fixtures, missing keys, and cleaning that falls short of the lease. Using a room-by-room checklist can help document the inspection.
How long does an apartment move-out inspection take?
Inspection time depends on the property and staff. Track your own inspection completion time to establish a baseline.
What should a digital move-out inspection checklist include?
A checklist can cover the exterior and entry, rooms, appliances, plumbing and fixtures, smoke detectors, cabinets, windows and locks, and cleanliness. Consider including condition fields, photo documentation, and a notes box.
Can tenants complete a move-out inspection remotely?
Check applicable rules and lease terms before changing how inspections are conducted.
