

Table of Contents
- Commercial Bathroom Sink Drain Replacement Steps: What Changes in a Commercial Setting
- Diagnose Before You Replace: Is It the Drain or Something Else?
- Bathroom Sink Drain Tools and Materials You Need on the Cart
- Choosing a Commercial Bathroom Sink Drain Assembly That Fits
- How to Install a Bathroom Sink Drain: Step-by-Step Replacement
- Commercial Codes, Accessibility, and Multi-Bay Shutdown Planning
- Sink Drain Installation Checklist for Faster Unit Turns
- Frequently Asked Questions
Last Updated: October 8, 2026
Commercial Bathroom Sink Drain Replacement Steps: What Changes in a Commercial Setting
Commercial bathroom sink drain replacement steps follow the same sequence as a home repair, but the stakes are higher: you work around guests, and every offline hour costs money.
A commercial bathroom sink drain assembly is the complete fitting that carries wastewater from the basin into the P-trap: drain flange, drain body, tailpiece, and pop-up linkage.

That traffic changes what you buy and how you install it: corrosion sets in faster, cheap pop-up stoppers fail sooner, and a single leaking drain can take a room out of service.
Diagnose Before You Replace: Is It the Drain or Something Else?
The first step in any sink drain replacement job is confirming the drain is actually the problem. Many callbacks blamed on the drain turn out to be a loose P-trap, worn gasket, or clogged tailpiece. Diagnose before you order parts:

- Water pooling under the sink: often a loose locknut or failed gasket, not the drain body.
- Slow drainage with a clean basin: usually a clog in the P-trap or tailpiece.
- Stopper won't hold water: a worn pop-up stopper or a bent pivot rod.
If the drain body shows corrosion or stripped threads, replace the whole assembly, patching a corroded drain wastes a second trip. Replacing only the pop-up stopper when the body is corroded means the sink drains fine until the body leaks two weeks later.
Bathroom Sink Drain Tools and Materials You Need on the Cart
Load the cart once to avoid the mid-job store run that kills a unit turn. A bathroom sink drain tools kit for commercial work should include:

Tools:
- Basin wrench (the key tool for reaching behind the basin)
- Adjustable wrench and channel-lock pliers
- Screwdriver set (Phillips and flathead)
- Putty knife
Materials:
- New drain assembly
- Plumber's putty or silicone sealant
- Replacement gaskets and washers
- Teflon tape for threaded connections
Choosing a Commercial Bathroom Sink Drain Assembly That Fits
Fit is where commercial jobs go wrong. A commercial bathroom sink drain assembly must match the drain opening size, tailpiece length, and fixture brand.
Check these before you buy:
| Check | What to Confirm | Why It Matters |
|---|---|---|
| Drain opening size | Standard 1-1/2 in. or 1-1/4 in. | Wrong size will not seal |
| Tailpiece length | Matches P-trap reach | Too short leaves a gap |
| Fixture brand | Moen, Delta, or BrassCraft style | Linkage must align |
| Finish | Matches existing faucet | Keeps units consistent |
| Material | Stainless steel or brass | Resists corrosion |
For portfolio work, standardize on one or two drain models across all units. Mixed parts slow every repair and create stockpiling headaches.
Ready Bathroom Solutions stocks OEM-grade drain assemblies from brands like Moen, Delta, and BrassCraft, so linkage and threads match what is already in the wall.
How to Install a Bathroom Sink Drain: Step-by-Step Replacement
Here is the full how to install a bathroom sink drain sequence, in four stages. Budget about 45 minutes for a first-time job and 20 to 30 minutes once your team knows the steps. The commercial difference is knowing which assembly you are installing before you start.
Know Your Commercial Drain Type Before You Start
Most residential guides assume a pop-up assembly. Commercial restrooms use several drain types, and the steps change by type:
- Pop-up assembly: the standard stopper-and-pivot-rod setup. Common in hotel guest baths and residential-style units.
- Grid strainer (grid drain): an open strainer with no stopper, used in high-traffic restrooms where a stopper would be broken or stolen. No pivot rod or linkage to disconnect.
- Lift-and-turn (push-pull) stopper: a stopper that seals by twisting or pulling, with no pivot rod behind the basin. Faster to swap, fewer linkage parts to fail.
- Waste valve / pop-up with overflow: the drain body has a side port that connects to the basin overflow channel. If you install a non-overflow drain body in an overflow basin, water backs up through the overflow and leaks.
Outlet size matters. Commercial lavatory drains are commonly 1-1/2 in. or 1-1/4 in. at the tailpiece, and the basin opening is typically 1-3/4 in. to 2-1/4 in. Measure both before ordering.
Overflow or no overflow. Look inside the basin for a small hole near the top of the bowl. If it is there, you need an overflow-style drain body. If it is not, a standard drain body is correct.
Step 1: Shut Off Water and Prep the Work Area
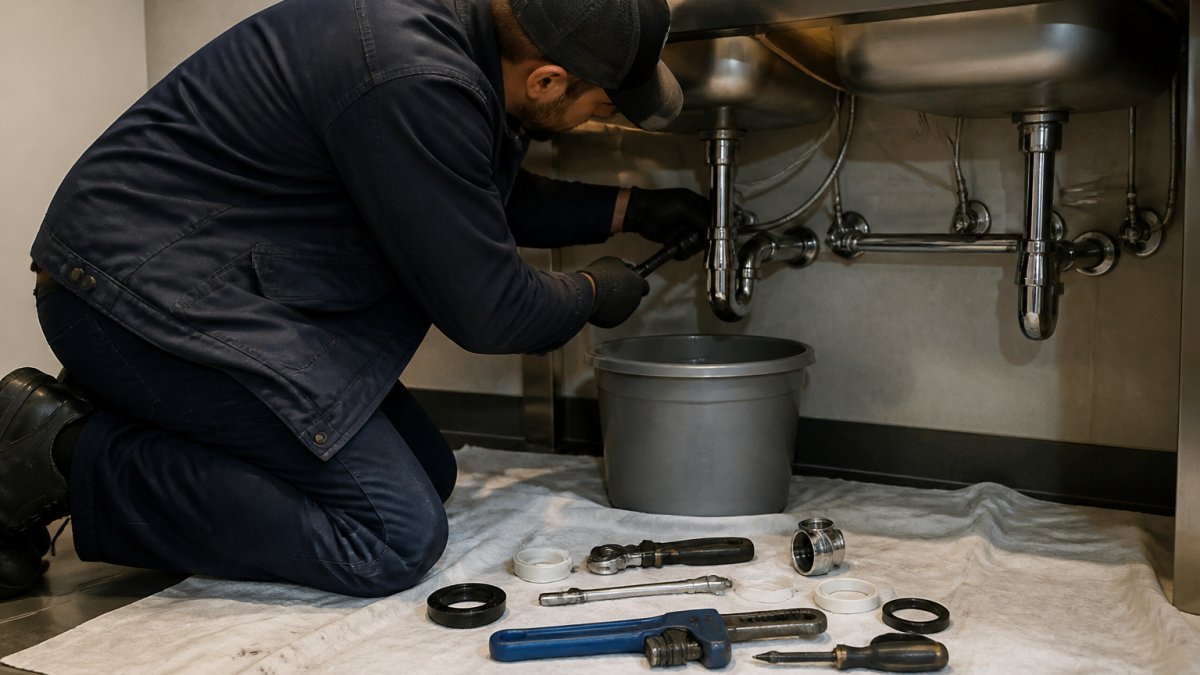
Close the shut-off valves under the sink and open the faucet to drain pressure. Place a bucket under the P-trap and lay a drop cloth across the vanity floor. Clear the basin and anything stored under the sink. In a guest room or occupied unit, tell the front desk or resident that water will be off. In a multi-bay restroom, isolate one bay at a time so the others stay in service.
Step 2: Disconnect the Pop-Up Linkage and Remove the Old Drain
Loosen the pivot rod nut behind the drain and pull the pivot rod free from the stopper linkage. Remove the stopper. On a grid strainer or lift-and-turn drain, skip the linkage step, there is no pivot rod. Disconnect the P-trap with channel-lock pliers and set it aside. From under the sink, unscrew the large locknut holding the drain body to the basin, twist the body free from above, and lift it out.
Drain Assembly - PROFLO® Popup® Pop-up Drain →
Step 3: Clean the Opening, Apply Sealant, and Set the New Drain
Scrape old putty and sealant from the drain opening with your putty knife and clean the rim so the new seal sits flat. Check the opening for chips or cracks, a cracked opening will not seal no matter how much putty you use, and the basin needs replacement. Roll a thin rope of plumber's putty around the underside of the new drain flange and press it into the opening from above.
Step 4: Reconnect the P-Trap, Linkage, and Test for Leaks
Reconnect the P-trap and hand-tighten the slip nuts, then snug them with pliers. Reattach the pivot rod to the stopper linkage and check that the stopper opens and closes smoothly.
Expected result: a stopper that holds water, a drain that empties fast, and dry connections under the sink. If the basin has an overflow, no water should appear at the overflow port after the thumb test.
Commercial Codes, Accessibility, and Multi-Bay Shutdown Planning
Commercial work adds rules that home repairs ignore. The two that trip up drain replacements most often are accessibility clearances and pipe protection under accessible lavatories.
Accessibility Clearances You Must Preserve
Under the ADA Standards for Accessible Design, an accessible lavatory must provide knee and toe clearance beneath the basin so a wheelchair user can pull up to the sink.
Insulate the drain and hot-water supply pipes. Exposed drain pipes and hot-water lines under an accessible lavatory must be wrapped so a seated user does not contact hot or abrasive surfaces.
Verify before you buy. Clearance and pipe-protection rules are enforced through local plumbing and building codes, and the adopted edition varies by jurisdiction.
Plan the Shutdown Before You Cut Water
A commercial restroom or multi-bay vanity rarely goes fully offline for a drain swap. Plan in stages:
- Isolate one bay at a time. Take a single sink out of service, complete the swap, restore water, then move to the next bay. The restroom stays usable throughout.
- Schedule during low-traffic hours. Overnight or early-morning windows reduce disruption and give you time to leak-test without rushing.
- Post signage at the entrance and at the bay. A "Sink out of service" sign prevents someone from using a bay mid-repair and getting water on the floor.
- Protect adjacent fixtures. Cover nearby sinks and counters with a drop cloth so debris and old putty do not end up in a working basin.
Post-Installation Leak Test and Maintenance Checklist
A drain swap is not finished when the water runs. Run this test before calling the job done:
- Static test: fill the basin to the overflow (or near the rim on a non-overflow basin) and let it sit for two minutes. Check the drain flange and locknut for weeping.
- Drain test: pull the stopper and let the basin empty. Watch the tailpiece, slip joints, and P-trap for drips as water flows.
- Overflow test: on an overflow basin, plug the overflow hole and fill to the rim. Any water at the overflow port means the gasket is not seated.
- Stopper test: confirm the stopper holds a full basin and releases cleanly. On a lift-and-turn, check that it seals with a quarter turn.
- Dry-check: wipe every connection dry, wait five minutes, and re-check for moisture.
Maintenance intervals. In high-traffic commercial restrooms, inspect drain connections and stopper linkage every three to six months. Re-tighten slip nuts, check the overflow gasket, and look for corrosion on the drain body.
When to call a professional plumber. If the waste line is clogged, the basin opening is cracked, the trap arm is corroded through, or the drain replacement still leaks after a proper reseal, the problem is beyond a drain swap.
Sink Drain Installation Checklist for Faster Unit Turns
Use this sink drain installation checklist on every job to cut callbacks and speed turns.
- Confirm the drain is the real problem, not the P-trap
- Shut off water and set the drop cloth and bucket
- Disconnect the pivot rod and remove the stopper
- Remove the P-trap and old drain body
Ready Bathroom Solutions builds pre-kitted bathroom repair sets so your team grabs one box and finishes the job. The kits carry OEM-grade parts, bundle savings of 15 to 20 percent, and standardized components that keep every unit consistent.
Frequently Asked Questions
How long does a commercial bathroom sink drain replacement take?
A single pop-up drain assembly swap typically runs 30 to 45 minutes once the vanity is cleared and water is off. Multi-bay or multi-unit work adds time for shutdown coordination, not the plumbing itself. Keeping a pre-kitted set of parts on the cart removes the store run that usually doubles the job, so technicians can finish and move to the next unit the same shift.
What tools are needed to replace a commercial bathroom sink drain?
You need a basin wrench, adjustable wrench, channel-lock pliers, screwdriver set, putty knife, and a bucket or towel for water spillage. Add plumber's putty or silicone sealant and a new gasket set. A headlamp helps in tight vanities. For commercial work, keep a second basin wrench and spare locknuts on hand so a stripped fitting does not stall the job or force a return visit.
How do you prevent leaks when installing a sink drain?
Seat the drain flange with a fresh gasket and a ring of plumber's putty or silicone sealant under the rim. Hand-tighten the locknut, then snug it with a wrench, never crank it. Align the tailpiece straight into the P-trap and tighten slip nuts by hand plus a quarter turn. Run hot water for two minutes, then check every threaded connection with a dry paper towel before closing the work order.
How do you identify the right replacement drain assembly?
Measure the drain opening, note the sink type, and match the assembly to the existing brand when possible. Standard vanity openings fit most pop-up assemblies, but commercial sinks may use a different waste outlet size. Check the overflow opening, tailpiece length, and finish to match the room. Ready Bathroom Solutions stocks PROFLO, Delta, and Jones Stephens assemblies so you can standardize one part number across a property.
A leaking or corroded drain should not cost you a second trip or a lost room night. Ready Bathroom Solutions helps property teams finish drain work in one visit with pre-kitted, OEM-grade parts, standardized components for portfolio-wide consistency, and all-in-one boxes that end the store runs. Get started with Ready Bathroom Solutions and get your units back in service faster.