

Table of Contents
- Shut Off the Water Supply and Diagnose the Leak
- Bathroom Sink P-Trap Replacement: Step-by-Step
- How to Fix a Slow Bathroom Sink Drain
- Faucet Cartridge and O-Ring Replacement
- Choosing a Bathroom Sink Maintenance Kit for Your Portfolio
- Post-Repair Testing and When to Call a Licensed Plumber
- Frequently Asked Questions
Last Updated: September 26, 2026
Shut Off the Water Supply and Diagnose the Leak
Bathroom sink repair always starts with the same two moves: kill the water, then find exactly where it's escaping. Skip either step and you'll chase the wrong part for an hour.

- Water at the faucet base → cartridge or O-ring failure
- Water on the tailpiece or trap joints → loose slip nut or worn gasket
- Water pooling under the basin rim → failed sealant or loose mounting
- Standing water in the bowl → clog or blocked P-trap
EPA WaterSense program guidance on fixing leaks
Tools You Need Before You Start
Stock these before you touch a fitting:
- Adjustable wrench and basin wrench for tight spaces
- Channel-lock pliers for slip nuts
- Bucket and towels for catch water
- Plumber's putty and silicone sealant
- Replacement gaskets, O-rings, and a spare P-trap
- Flashlight for under-cabinet work
Bathroom Sink P-Trap Replacement: Step-by-Step
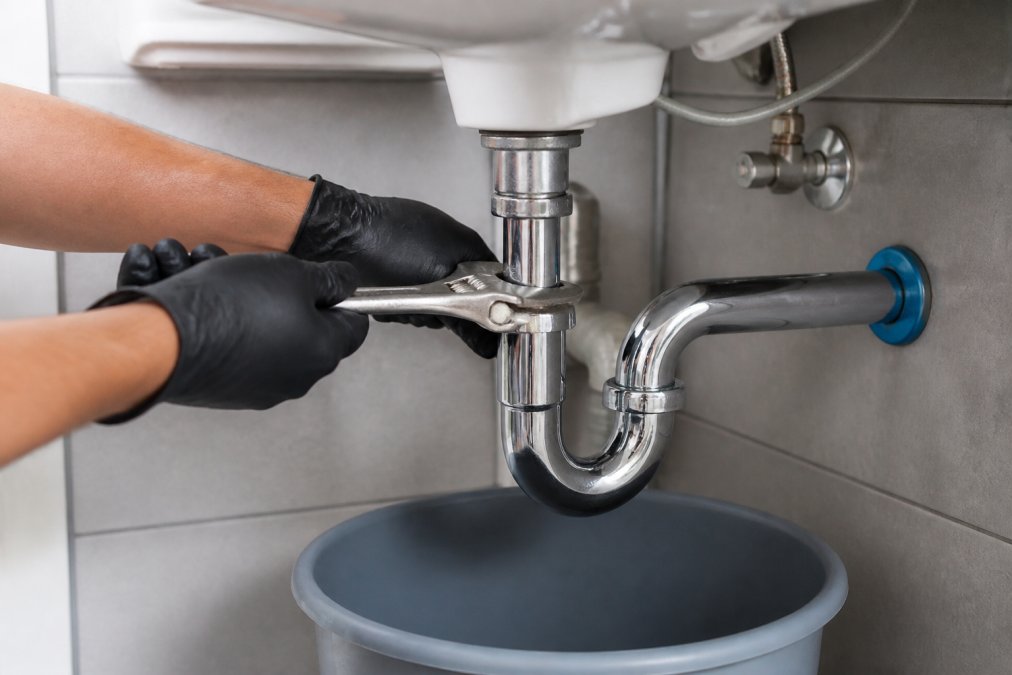
Bathroom sink P-trap replacement is the single most common fix for under-sink leaks, and it's a job most homeowners can finish in about 20 minutes. The P-trap holds a water seal that blocks sewer gas, so a cracked, misaligned, or dry trap causes both leaks and odors.

Match the Trap to the Material Before You Buy
Most content treats every P-trap the same. They aren't. The material determines how much torque the nuts take, how the trap handles heat, and how long it lasts.
- PVC (white or cream plastic): The most common residential trap. Cheap, easy to cut, and forgiving, but the slip nuts crack if you overtighten. Hand-tight plus a quarter turn is the ceiling.
- ABS (black plastic): Common in older construction. Bonds with ABS cement rather than solvent that works on PVC, so don't mix cements if you're splicing. Same overtightening risk as PVC.
- Chrome-plated brass: The exposed trap under a pedestal or wall-mounted sink. Heavier, holds a polished finish, and tolerates more torque, but the plating chips if you use pliers directly on the nut. Wrap the jaws in tape or use a strap wrench.
- Schedule 40 vs. thin-wall: A thin-wall trap is fine for a lavatory drain, but it dents and deforms if you force a misaligned joint. If the existing trap is thin-wall and the tailpiece is Schedule 40, match the new trap to the tailpiece.
Sizing and Alignment
A P-trap that's the wrong size or angle leaks no matter how well you tighten it.
- Diameter: Lavatory drains are almost always 1-1/4 inch. Kitchen and tub drains are 1-1/2 inch. Buying a 1-1/2-inch trap for a bathroom sink is a common mistake that guarantees a leak at the tailpiece.
- Reach: Measure from the tailpiece outlet to the wall stub-out before you buy. A trap with too little reach pulls the joints out of alignment; too much reach and the trap arm slopes the wrong way.
- Slope: The trap arm (the horizontal run to the wall) must slope slightly downward toward the wall, roughly 1/4 inch per foot. A flat or back-sloped arm traps water and clogs.
- Depth: The water seal should be 2 to 4 inches deep (General Requirements for Traps). Too shallow and sewer gas pushes through; too deep and the drain runs slow.
Step-by-Step
- Place the bucket directly under the trap.
- Loosen both slip nuts by hand, then with pliers if needed. On chrome, protect the finish.
- Pull the trap free and empty it into the bucket. Expect standing water and debris.
- Clean the mating surfaces on the tailpiece and the wall stub-out. Old putty or tape left behind causes a slow weep.
- Check the washers. A beveled washer goes with the bevel facing the nut; a flat washer seats against the pipe. Reversed washers are a top cause of drips after a fresh install.
- Fit the new trap. Hand-tighten both nuts, then a quarter turn with pliers. Stop there.
- Run hot water for a full minute and check both joints with a dry rag.
Do not overtighten plastic nuts. They crack, and a cracked nut leaks worse than the one you replaced.
When the Trap Isn't the Problem
A trap that keeps leaking after a clean install usually points elsewhere:
- Leak at the tailpiece, not the trap: The tailpiece gasket is worn or the flange is cracked. Replace the tailpiece, not the trap.
- Leak only when the sink drains: The trap arm or the wall stub-out is cracked. Look for a hairline split on the underside.
- Sewer smell with no leak: The trap has gone dry from disuse, or the vent stack is blocked. Run water in the fixture for a minute; if the smell returns, the vent is the issue.
How to Fix a Slow Bathroom Sink Drain
A slow drain is usually buildup, not a full blockage. Soap scum, hair, shaving cream residue, and mineral buildup coat the pipe walls and narrow the opening over time. The fix depends entirely on where the restriction sits, so diagnose before you reach for a tool.
Diagnose Where the Slowdown Lives
Work from the top down. Each step isolates a different part of the drain path.
- Aerator: Unscrew the aerator from the faucet tip and check the screen. If it's crusted with mineral scale, the flow is restricted at the faucet, not the drain. Soak it in white vinegar for 30 minutes and scrub.
- Stopper and pop-up assembly: Pull the stopper and clear hair from the pivot rod and the pop-up linkage. A stopper that doesn't fully rise is a common cause of a slow drain that looks like a clog.
- P-trap: Remove the trap and clear it by hand. This catches the debris that never made it past the trap.
- Branch line: If the trap is clear and the drain is still slow, the restriction is in the horizontal run to the wall. That's snake territory.
Clear the Line Without Damaging It
For deeper buildup, use a drain snake rather than chemical cleaners. Chemical cleaners can damage older pipes and fittings, and they don't remove the buildup, they just punch a hole through it, so the clog returns.
- Hand snake (drum auger): Best for a lavatory branch line. Feed the cable slowly and crank clockwise. Don't force it past a hard stop, you'll push the clog deeper or kink the cable.
- Zip tool: A cheap plastic strip with barbs. Excellent for pulling hair out of a pop-up drain without removing the trap.
- Enzyme drain cleaner: A maintenance product, not a clog-buster. It digests organic buildup over days. Useful for preventing recurrence, not for clearing an active blockage.
Troubleshooting Low Water Pressure at the Faucet
A slow drain and low water pressure are different problems, and homeowners often confuse them. If the bowl drains fine but the faucet trickles, the issue is on the supply side.
- Both hot and cold weak: The aerator is clogged, or the shut-off valves under the sink aren't fully open. Check the aerator first, it's the most common cause.
- Only hot weak: Mineral buildup in the hot-side cartridge or a failing water heater dip tube. Start with the cartridge.
- Only cold weak: A partially closed cold shut-off valve or a clogged supply line. Open the valve fully and check the line for kinks.
- Pressure drops when another fixture runs: A shared supply line or a pressure-balancing valve issue. This is a plumbing-system problem, not a sink problem.
Prevent Recurrence
- Run hot water for 30 seconds after each use to flush soap and shaving residue.
- Use a hair catcher in the drain.
- Once a month, pour a kettle of hot (not boiling) water down the drain to melt soap scum before it hardens.
- Every few months, run an enzyme cleaner overnight to digest organic buildup.
Faucet Cartridge and O-Ring Replacement
A dripping faucet almost always traces to the cartridge or an O-ring, not the valve body. This is the repair that stops the drip that drives residents crazy.
Choosing a Bathroom Sink Maintenance Kit for Your Portfolio
The parts aren't the problem. The store run is. Every trip for a single O-ring burns labor hours you can't bill and delays a unit turn.
| Kit Approach | Best For | Trade-off |
|---|---|---|
| Single-part ordering | One-off repairs | Store runs, mismatched parts |
| Bulk loose stock | High-volume teams | Stockpiling, no standardization |
| Pre-kitted repair sets | Multi-property portfolios | Requires planning ahead |
Post-Repair Testing and When to Call a Licensed Plumber
Test every repair before you close the cabinet door. Run hot and cold water for two full minutes, fill the basin, then drain it while watching every joint. Dry the area and check again after ten minutes. A joint that weeps under pressure won't show until the cabinet is closed and forgotten.
Frequently Asked Questions
How do I repair a damaged bathroom sink?
First, shut off the water supply valves under the sink. For chips or cracks in the basin, apply a color-matched epoxy or silicone sealant made for porcelain or ceramic. For leaks at the drain or P-trap, replace the gasket or O-ring. For faucet drips, swap the cartridge. Keep a bathroom sink maintenance kit on hand so you have the right gaskets, sealant, and cartridges without a store run. If the basin is cracked through, replacement is usually the safer call.
What should I look for in a bathroom sink maintenance kit?
Look for OEM-grade parts that match the fixtures already in your units, such as Moen, Delta, and BrassCraft components. A good kit includes replacement cartridges, O-rings, gaskets, plumber's putty, and sealant. Pre-kitted sets cut store runs and keep your team from mixing incompatible parts. Standardized kits also help you maintain consistent quality across every property in your portfolio, which reduces repeat visits and callbacks.
How do I replace the seal on a bathroom sink?
Start by shutting off the water and draining the sink. Disconnect the P-trap and remove the drain assembly from the basin. Scrape off the old plumber's putty or silicone, then apply a fresh bead of plumber's putty around the drain flange. Reinstall the drain, tighten the locknut from below, and reconnect the P-trap. Run water for two minutes and check for drips at the flange and the P-trap connections before you close up the cabinet.
When should I replace a bathroom sink instead of repairing it?
Replace the sink when the basin has a structural crack, when the fixture is more than 20 years old and parts are hard to source, or when repeated repairs cost more than a new unit. Surface chips, drips, slow drains, and loose drains are all repairable. If you manage multiple units, standardizing on one sink model and one maintenance kit makes replacement decisions faster and keeps your parts inventory simple.
Most bathroom sink repair headaches come down to missing parts and repeat trips, not difficult work. Ready Bathroom Solutions ships OEM-grade kits with standardized components, 15-20% bundle savings, and an all-in-one box design that gets units back in service faster. Cut the store runs and the callbacks. Shop All Bathroom Kits and standardize your maintenance process across every property.