

Quick Summary
Shower maintenance is mostly about preventing buildup before it causes damage. Squeegee the glass and walls after every use, run the exhaust fan for about 20 minutes, clean the glass weekly, and check caulk, grout and drains regularly. Those habits stop mold, hard-water stains and clogs that drive most repair calls.
- Squeegee glass and walls after every shower, which takes about one minute.
- Run the exhaust fan for at least 20 minutes after each shower, or until the mirror clears.
- Clean shower glass and tile with a non-abrasive cleaner once a week.
- Descale the showerhead every three months by soaking it in white vinegar for 30 to 60 minutes.
- Press caulk with a thumb monthly; soft or peeling caulk has already failed.
Table of Contents
- 1. Rinse and Dry the Shower After Every Use
- 2. Keep Shower Glass Clean With a Weekly Routine
- 3. Clean the Shower Head and Remove Mineral Buildup
- 4. Check and Clear the Shower Drain Regularly
- 5. Inspect for Leaks Before They Cause Damage
- A Practical Shower Maintenance Checklist and Schedule
- Order Your Shower Parts and Schedule the Next Service
- Frequently Asked Questions
1. Rinse and Dry the Shower After Every Use
Last Updated: November 2, 2026
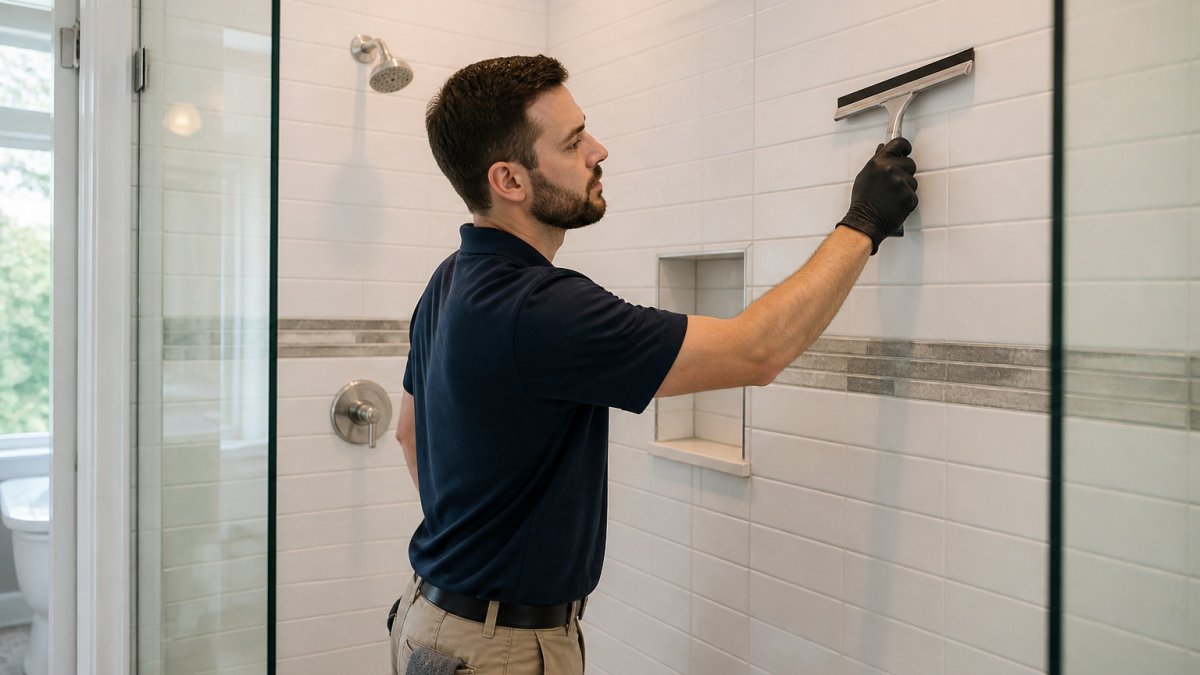
Shower maintenance starts with a habit most people never think about: drying the shower after each use. Standing water feeds mold, mildew and hard-water stains, and those problems are what drive most callbacks. Dry surfaces stay clean longer, and the repairs that follow are smaller.
This is the first of five practices that prevent shower repairs. Each one targets a specific failure point, from the glass and showerhead to the drain and the valve behind the wall.
Why drying matters more than cleaning
Cleaning removes what is already there. Drying prevents the next buildup. Mold and mildew need moisture to grow, and a wet shower gives them that for hours after the water stops running. A quick pass with a squeegee or a dry towel takes less than a minute.
Keeping a squeegee and a microfiber towel in every shower in a multifamily unit makes drying easier between visits. Ventilation matters too. Run the exhaust fan for at least 20 minutes after each shower, or until the mirror clears.
Watch out: Dry the grout lines and the corners of the tub or shower floor, because standing water collects there and stays longest.
2. Keep Shower Glass Clean With a Weekly Routine
Glass shower doors show soap scum and hard-water spots faster than any other surface. Soap scum is a mix of body oils, dead skin, and the calcium and magnesium in water; once that film bonds to glass, daily wipes stop working and the door needs a heavier scrub. A weekly routine keeps the glass clear and makes each cleaning faster.
Match the cleaner and tool to the glass
Not all shower glass behaves the same, and the wrong tool does permanent damage.
- Tempered clear glass (the most common door): a non-abrasive glass and tile cleaner, a soft sponge or microfiber cloth, and a squeegee. Avoid abrasive powders, steel wool, and razor blades on coated surfaces.
- Frosted or etched glass: the texture traps film, so use a soft brush (an old toothbrush works on edges) and rinse more thoroughly. Abrasives dull the frost pattern permanently.
- Glass with a factory hydrophobic coating: skip acidic cleaners and vinegar soaks, which strip the coating faster. Use a pH-neutral cleaner and reapply the manufacturer's coating per its instructions.
- Frameless glass with exposed edges: keep cleaners off the raw edge and dry the bottom edge, because moisture wicks into the laminate and clouds it.
Use a non-abrasive cleaner made for glass and tile, then rinse thoroughly. Avoid mixing cleaners. Bleach combined with ammonia or acidic products releases harmful fumes, so use one product at a time and ventilate the room (the CDC).
Squeegeeing walls and glass
After every shower, pull a squeegee from the top of the glass down to the bottom, then across the walls. This removes most of the water before it dries into spots. Work in overlapping strokes and wipe the blade after each pass. A squeegee with a continuous, sharp blade beats a stiff one that skips; replace the blade when it starts streaking.
Once a week, spray the glass and tile with the cleaner, let it sit for a few minutes, and scrub gently with a soft sponge. Rinse with warm water and squeegee dry. Pay attention to the track at the bottom of sliding doors, where grime and mildew hide. A cotton swab or a folded microfiber cloth run along the track once a week keeps the rollers from gumming up.
Watch out: Never use a razor blade or a scouring pad on coated or frosted glass, and never let an acidic cleaner sit on natural stone trim around the door, because it etches the surface and the damage cannot be polished out.
3. Clean the Shower Head and Remove Mineral Buildup
Mineral deposits from hard water clog the nozzles of a showerhead and reduce the water flow. Over time, the spray pattern gets uneven and pressure drops.
Cleaning the showerhead every few months prevents most of this. Remove it from the arm, soak it in white vinegar for 30 to 60 minutes, then scrub the nozzles with an old toothbrush. Rinse well and reattach it. If the buildup is severe, the showerhead may need to be replaced.
Shower Head - Delta Faucet In2ition® Multi Function Showerhead in Matte Black is a replacement option when the spray pattern no longer recovers after cleaning. It offers multiple spray settings and operates at a water-efficient 1.75 gpm.
Shower Drain - PROFLO® 2 in. Brass No Caulk Shower Drain with 4-1/2 in. Strainer →

4. Check and Clear the Shower Drain Regularly
Hair, soap residue and debris collect in the drain and slow the water. A slow drain often signals a clog that will get worse. Clearing the strainer every week or two prevents most backups.
Lift the strainer, remove any hair with a gloved hand or a plastic tool, and flush with hot water. Avoid harsh chemical drain openers on a regular schedule, because repeated use can damage the drain body and the pipe joints.
Choosing a drain that suits your floor
Drain choice affects how easy the drain is to maintain. A strainer that sits flush with the tile collects less debris at the edges, and a removable cover makes cleaning faster. The right option depends on the shower floor and the materials used. How to Compare Brass vs Plastic Shower Drains for Durability explains the tradeoffs in more detail. If you are replacing a worn unit, Shower Drain - PROFLO® 2 in. PVC Solvent Weld Shower Drain with Strainer offers a PVC solvent weld connection and a plastic body.

5. Inspect for Leaks Before They Cause Damage
Small leaks can lead to larger repairs. Water that seeps behind the wall or under the tile can damage framing and encourage mold before a stain is visible. Regular inspection can catch the problem earlier.
What to check, and what each material tells you
- Caulk at the tub and shower base: press it with a thumb. Soft, gummy, or peeling caulk has failed even if it looks intact. Cut it out and replace it with a mildew-resistant silicone rated for wet areas.
- Grout lines: run a finger along the floor and lower walls. Crumbling grout or a hollow sound means water is getting behind the tile. Regrout and reseal rather than just cleaning over it.
- Valve trim and supply connections: run the shower for several minutes and watch the trim plate and the supply lines for drips. A drip at the trim usually means a worn cartridge or O-ring, not a failed valve body.
- Shower pan and drain seal: look for a soft spot or a flex in the floor near the drain. A flexible pan means the waterproof membrane or the drain seal has failed, and no amount of surface cleaning fixes it.
- Adjacent drywall and baseboards: discoloration, peeling paint, or a musty smell on the wall behind or beside the shower is the first visible sign of a hidden leak.
How leaks travel
Water follows the path of least resistance: it runs down the back of tile, pools on the pan membrane, and wicks into framing and drywall. That is why a leak at the valve can show up as a stain on the ceiling below or a soft baseboard in the next room. Inspect the rooms adjacent to and below the shower, not just the shower itself.
Put inspection on a schedule
Tie the checks to the maintenance calendar so they actually happen: a quick visual pass monthly, a full caulk-and-grout check quarterly, and a valve and supply-line check seasonally or before peak occupancy.
If you find a leak and water has already spread, document the damage with dated photos before cleanup. 7 Steps to Document Water Damage for Insurance Claims walks through that process. For a failing valve, Affordable Shower Valve Replacement for Multi-Family Properties covers repair options for property teams.
Watch out: Do not seal over wet caulk or grout with fresh silicone, because trapped moisture keeps feeding mold behind the new bead and the repair fails within months.
A Practical Shower Maintenance Checklist and Schedule
Use this schedule to keep showers in good condition between service visits.
| Task | Frequency | Time Needed |
|---|---|---|
| Squeegee glass and walls | After each use | 1 minute |
| Run exhaust fan | After each use, 20 minutes | Passive |
| Deep clean glass and tile | Weekly | 15 to 20 minutes |
| Clean showerhead | Every 3 months | 30 minutes |
| Clear drain strainer | Every 1 to 2 weeks | 5 minutes |
| Inspect caulk, grout and valve | Monthly | 10 minutes |
- Squeegee after every shower
- Run the exhaust fan
- Clean glass and tile weekly
- Descale the showerhead quarterly
- Clear the drain strainer
- Check for leaks and soft spots monthly
Order Your Shower Parts and Schedule the Next Service
Ready Bathroom Solutions supplies pre-kitted bathroom repair sets with OEM-grade parts from brands such as Moen, Delta and BrassCraft. Our all-in-one boxes are designed to eliminate store runs, and bundles offer 15-20% savings.
Start with the parts your team replaces most often, then add a monthly inspection to your schedule. Shop All Bathroom Kits to get the parts you need in one order.
Frequently Asked Questions
How often should you clean a shower?
Rinse and dry the shower after every use, wipe glass and walls weekly, and deep-clean grout, drains and the shower head about once a month. High-use showers in multifamily units or hotels may need a more frequent schedule, since daily moisture builds soap scum and mildew faster. A simple written schedule helps keep cleaning consistent between visits.
What is the easiest way to clean a shower without scrubbing?
Spray a mild, non-abrasive cleaner on wet surfaces after each use, then rinse and squeegee while the surface is still damp. Regular wiping keeps soap scum from bonding to tile and glass, so heavy scrubbing becomes unnecessary. For stubborn spots, let the cleaner dwell for several minutes before rinsing. Never mix cleaners, and ventilate the room when using any product.
How do you keep shower glass clean?
Squeegee the glass after every shower, then rinse with warm water and dry with a soft cloth. This prevents hard-water spots from forming as water evaporates. Once a week, apply a glass-safe cleaner, let it sit briefly, and wipe with a microfiber cloth. Check door tracks and seals monthly, since trapped grime there is a common source of odors and leaks.
How do you clean a shower head?
Remove the head if it unscrews, soak it in a vinegar and water solution for about an hour to dissolve mineral deposits, then scrub the nozzles with a soft brush and rinse thoroughly. Run water through the head afterward to clear any remaining debris. Clean the shower head every one to three months, or sooner in areas with hard water, to keep spray pattern and flow consistent.
